
|
|
Ready to begin construction? Open the Warcraft III World Editor and take a look at the empty map before you. The editor defaults to a small map when opened, one that’s just fine for beginners.
| ||||||||
| ||||||||
|
Like with any construction job, the first thing you should do is create a blueprint. Sit down with a piece of paper and a pen and sketch out your map’s basics. Will it be a simple melee map where it’s everyone for themselves? Will it feature a single-player quest? A combination of the two? This step will help you avoid time-consuming mistakes later.
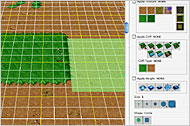
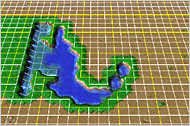
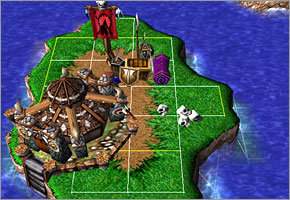
Next, lay your foundation. Take a look at the terrain palette and select the type of terrain you’d like to lay down. Note that you can click and drag to spread the terrain around a wide area. To copy and paste a large swatch of terrain, press the Escape key on your keyboard to deselect the terrain palette. Then click on the map and drag a box around the terrain you’d like to copy. Select “Copy” from the menu and then select “Paste.” Now you can drag the box around the map until it’s in the spot where you want to place the terrain; click your mouse button and it will appear there. Enriching the Map Now the fun begins. Select the unit palette and click on “Player 1.” Decide which of the four races this player will be and where you’d like to place her starting point by selecting the starting point (the circle with triangles around it) and clicking on the appropriate spot on the map. Now click on the units you’d like this player to start with and scatter them around the starting point. If you’d like to create a custom unit, open the unit editor and click on the New Custom Unit button. Now you’ll see a dialog box that allows you to name the unit and decide what it will be. When you’re done, it will appear at the bottom of the unit palette. | ||||||||
| ||||||||
|
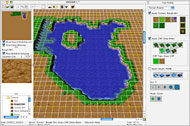
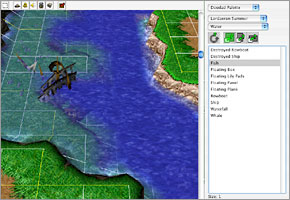
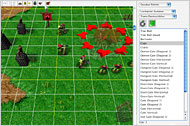
Remember that you’ll find non-player units, as well as magical items, in the unit palette too. Non-player units are the creeps, merchants, and other beings that the players will encounter as they explore your map. Some of them are passive toward other units while some will attack on sight. The magical items available in the unit palette are the potions, scrolls, rings, and other mystical treasures that you’ve seen during the single-player game. They can easily affect the balance of the game when they’re found, so use them cautiously.
Next, decide which buildings (if any) you’d like this player to begin the game with and place them around the starting point too. If the map is meant for melees, you probably won’t want many buildings or units for each player. If it’s a quest, however, you should probably place the emphasis on discovery and make sure that the player doesn’t have to waste a lot of time erecting buildings and training enough units to start the journey. In the doodad palette, you’ll find lots of neat stuff you can scatter around the map for added atmosphere. Items such as crates, bookshelves, and archery targets will give your world a “lived in” feel, as if it’s been sitting there for years, waiting to be discovered by someone. Make sure you check the options from the various game environments, such as dungeons, villages, and Ashenvale, to see the full assortment of doodads available. And don’t forget that your players will need plenty of trees to harvest, especially in a melee map, so that they can erect buildings and train units. You’ll find trees in the doodad palette. Trigger-Building Essentials The other two palettes in the editor, for cameras and regions, apply to the triggers you’ll create in the trigger editor. If you’ve ever created a rule in your email application, you have a basic idea how triggers work. They’re essentially mini programs that execute a series of commands when certain criteria are met. For example, you can create a trigger that displays a message when one player’s hero encounters another player’s hero, complete with a song or sound file and a short animation. | ||||||||
| ||||||||
|
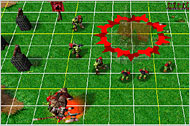
The camera palette helps you identify what the players will see when the trigger is activated. The region palette allows you to specify a certain area of the map that will trip a trigger if certain conditions are met (for example, if a hero enters the space around another player’s starting point). You can place Way Gates in specific regions and tell them to send units to another region on the map automatically.
Anytime you’d like to see your map in action, click “Test Map” in the File menu and Warcraft III will launch and automatically load your map. This will give you an opportunity to fix any bugs before you share your map with others. For More Information Have questions about topics that aren’t covered here? Visit the Warcraft III World Editor forum on Battle.net and exchange tips and tricks with fellow map builders. Another way to get useful tips is to open the maps in the Scenario folder inside the Maps folder. Then you can see how other designers created triggers that are similar to the ones you have in mind. |

|
|