You’ll need to become intimately acquainted with your weapons, vehicles, and the landscape if you even hope to survive in Halo.

Weapons
If you run out of ammo, press “F” to enter melee mode and use your gun as a club. You can melee attack faster with the plasma pistol than with the others, and in multi-player mode a melee strike to the back of the head gives you a free taunt, which is very satisfying when you sneak up on someone camping with a sniper rifle or a rocket launcher.
Instead of selecting them, as you must do in most first-person shooters, simply press the right mouse button to throw your grenades. This allows you to toss them without putting away your current weapon.
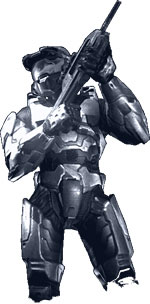
Marines
M6D Pistol: This is a standard-issue pistol that makes a fine secondary weapon. Hold down the fire button for automatic fire, but be aware that mode decreases your accuracy. A head shot guarantees incapacitation of your target; on the Covenant, look for the line through the ears and right below the crowns of their skulls.
M9 HE-DP Grenade: This fragmentation grenade can disable all vehicles except tanks and is perfect for taking out a group of Covenant soldiers at once. Bounce it off walls to nail enemies hidden in hard-to-reach places.
 MA5B Assault Rifle: Use this gun to spray enemies with many rounds at once. Hold down the fire button for automatic fire, but you’ll lose accuracy and you’ll have to reload more often in the process. Use short, controlled bursts for long-range fire. This rifle’s computer display shows you both the number of rounds remaining and the relative location of the nearby gas giant Threshold, which is a handy navigation tool. MA5B Assault Rifle: Use this gun to spray enemies with many rounds at once. Hold down the fire button for automatic fire, but you’ll lose accuracy and you’ll have to reload more often in the process. Use short, controlled bursts for long-range fire. This rifle’s computer display shows you both the number of rounds remaining and the relative location of the nearby gas giant Threshold, which is a handy navigation tool.
M90 Shotgun: This weapon is perfect for close encounters, where a single blast is enough to kill most enemies; sometimes one shot will take out multiple foes. It’s useless at long range, of course, and it takes longer to reload than the other Marine weapons, so make sure you refill the shells after every battle.
S2 AM Sniper Rifle: Press “Z” to zoom in at 2X, and again to zoom in at 8X, with this weapon and blow away long range enemies. This weapon is perfect for taking out Covenant soldiers before they even realize you’re around, but it’s pretty much useless in short range encounters, of course, so make sure you have a solid secondary weapon.
 M19 SSM Rocket Launcher: No self-respecting first-person shooter comes without a rocket launcher, also called a “newb (as in newbie) tube” among veteran multi-player gamers who tire of getting blown away by newcomers. Like the sniper rifle, the M19 comes with 2X and 8X zoom if you press “Z.” Save this weapon for the really tough enemies and make sure you fire at their feet; if you aim for their bodies and miss, the rocket will fly by without causing any damage. The M19 is also perfect for downing aircraft. M19 SSM Rocket Launcher: No self-respecting first-person shooter comes without a rocket launcher, also called a “newb (as in newbie) tube” among veteran multi-player gamers who tire of getting blown away by newcomers. Like the sniper rifle, the M19 comes with 2X and 8X zoom if you press “Z.” Save this weapon for the really tough enemies and make sure you fire at their feet; if you aim for their bodies and miss, the rocket will fly by without causing any damage. The M19 is also perfect for downing aircraft.
M7057 Defoliant Projector (Multi-Player Only): This flamethrower is difficult to carry and aim, but it’s deadly in close quarters, thanks to the semi-liquid, adhesive quality of the fire.
|
|
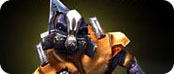
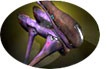
Covenant
 Plasma Rifle: Hold down the left mouse button for automatic fire when using this weapon. Don’t keep it down for too long, however, or the rifle will overheat and you’ll waste a few precious seconds waiting for it to cool off. (Keep a good gun as your secondary weapon in case that happens.) Plasma Rifle: Hold down the left mouse button for automatic fire when using this weapon. Don’t keep it down for too long, however, or the rifle will overheat and you’ll waste a few precious seconds waiting for it to cool off. (Keep a good gun as your secondary weapon in case that happens.)
Plasma Pistol: Rapidly click the fire button to inflict more damage than you can with the Marine-issue pistol, or hold it down to build up a charge that really packs a punch when you release it. The latter fire mode can disable an enemy’s shields with one shot but it also rapidly depletes the gun’s energy source, however, so use it only against tough enemies. You can dispatch Covenant grunts with a shot or two with this weapon.
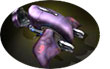
 Needler: Unlike the Covenant’s plasma guns, this weapon uses clips that you must reload when empty. Its shots move slowly, but they hone in on their target and explode on contact. Fire rapidly to inflict maximum damage. Needler: Unlike the Covenant’s plasma guns, this weapon uses clips that you must reload when empty. Its shots move slowly, but they hone in on their target and explode on contact. Fire rapidly to inflict maximum damage.
Plasma Grenade: Unlike Marine-issue grenades, these glowing devices stick to enemies and explode after three seconds, which means they not only take out their targets but also anyone standing nearby. They also don’t bounce off walls and floors, which allows you to toss them onto a high ledge without worrying that they’ll come back down.
 Fuel Rod Gun (Multi-Player Only): This weapon fires its shots in an arc; they’re extremely effective against most vehicles. Like the plasma weapons, the fuel rod gun runs off an energy source that eventually depletes. Fuel Rod Gun (Multi-Player Only): This weapon fires its shots in an arc; they’re extremely effective against most vehicles. Like the plasma weapons, the fuel rod gun runs off an energy source that eventually depletes.

|
|
|
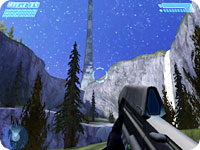
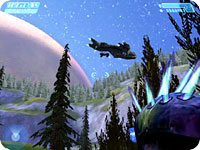
Over the Hills and Far Away. There’s a lot of territory to explore in Halo,
but sometimes you may feel like you’re going in circles.
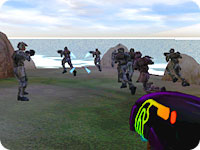
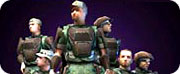
You Guys Check That Out While I Wait Here. The Marines are mostly cannon
fodder, but they do come in handy when the numbers look overwhelming.
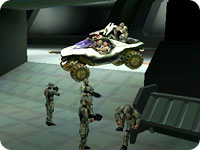
The Cavalry. A Marine drop ship arrives to provide much-needed help.
Move ’Em Out! Combat preparations aboard the Pillar of Autumn.
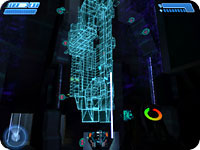
Digging Up Secrets. What is this structure? Play the game and find out.

You Are Here. A 3D representation of Halo — and the world it spins
around — offer more clues to the mystery.
|
Vehicles
Marines
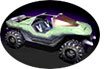 M12 LRV Warthog: Jump in the driver’s seat and pull up next to a few Marines so that one will join you on the passenger side and another will get in back and man the M41 light anti-aircraft gun (which is also perfect for taking out land targets). It can roll over easily, but you can flip it over again by standing next to it and pressing “E.” (The same applies to any land vehicles or stationary guns that flip over, or even airborne vehicles that crash upside down, assuming they’re not completely destroyed.) Use slides to run over enemies, who try to roll out of the way but are easier to hit with a slide than straight on. M12 LRV Warthog: Jump in the driver’s seat and pull up next to a few Marines so that one will join you on the passenger side and another will get in back and man the M41 light anti-aircraft gun (which is also perfect for taking out land targets). It can roll over easily, but you can flip it over again by standing next to it and pressing “E.” (The same applies to any land vehicles or stationary guns that flip over, or even airborne vehicles that crash upside down, assuming they’re not completely destroyed.) Use slides to run over enemies, who try to roll out of the way but are easier to hit with a slide than straight on.
M12 A1 Warthog LAAV (Multi-Player Only): This Warthog variant sports a rocket launcher instead of an anti-aircraft gun in the back.
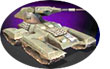 M808B Scorpion Main Battle Tank: This tank’s thick skin makes it almost invulnerable to small arms fire, but it is susceptible to heavier weapons. There’s also a wide swath of space around it in which enemy infantry can stand and not be shot, so make sure troops don’t get too close. The Scorpion also has room on the track pods for up to four Marines to ride and fire at the enemy. While the main cannon cools off and is reloaded after firing, switch to the secondary gun. M808B Scorpion Main Battle Tank: This tank’s thick skin makes it almost invulnerable to small arms fire, but it is susceptible to heavier weapons. There’s also a wide swath of space around it in which enemy infantry can stand and not be shot, so make sure troops don’t get too close. The Scorpion also has room on the track pods for up to four Marines to ride and fire at the enemy. While the main cannon cools off and is reloaded after firing, switch to the secondary gun.
|
|
Covenant
 Ghost: This hover vehicle is used primarily for reconnaissance and rapid attacks with its twin plasma cannons. It holds just one pilot and its size makes it quick and maneuverable, although it only offers minimal armor for protection. And remember that, because it’s a hovercraft, you will fall to your death if you go over a cliff in it. Ghost: This hover vehicle is used primarily for reconnaissance and rapid attacks with its twin plasma cannons. It holds just one pilot and its size makes it quick and maneuverable, although it only offers minimal armor for protection. And remember that, because it’s a hovercraft, you will fall to your death if you go over a cliff in it.
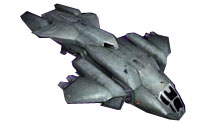
 Banshee: Like the Ghost, the Banshee can only hold one person at a time and it uses twin plasma cannons. Its secondary weapons, however, are dual fuel rod cannons, and its armor is solid enough to require heavy weapons to destroy it. It can also fly high enough to reach otherwise inaccessible spots. Banshee: Like the Ghost, the Banshee can only hold one person at a time and it uses twin plasma cannons. Its secondary weapons, however, are dual fuel rod cannons, and its armor is solid enough to require heavy weapons to destroy it. It can also fly high enough to reach otherwise inaccessible spots.
Shade Stationary Gun: It’s not a vehicle per se, and it doesn’t move, but you can hop in the seat behind this plasma cannon and wipe out approaching troops when necessary. Just remember that you don’t have much protection while you’re sitting in it, so it’s a good idea to jump out if you find yourself under heavy attack. It’s indestructible, so you can flip it over if it gets knocked on its side. When you’re on the defensive, snipe the gunner from long range.
Wraith Mortar Tank: You can’t get in and drive this one when you find it, so destroy it as fast as you can or get out of the way of its arcing mortar shots, which can kill you with one hit. Take it out with a pair of rockets or use the Banshee or the Ghost and strafe it, making sure you stay out of the way of its mortars. You can also use the Warthog against it, although its armor is so strong that it will take a lot of fire from the anti-aircraft gun before exploding.
|
Tips and Tricks
 When driving around in the warthog, remember that you can get out of it if you need to explore places too cramped for the vehicle. This is a requirement, for example, if you want to find the switch to activate the light bridge after you’ve ventured into the underground complex early in the Halo level. When driving around in the warthog, remember that you can get out of it if you need to explore places too cramped for the vehicle. This is a requirement, for example, if you want to find the switch to activate the light bridge after you’ve ventured into the underground complex early in the Halo level.
During firefights, be careful where you shoot: you can hurt and even kill the Marines accompanying you.
You don’t start losing health until your suit’s shields become completely depleted from enemy shots. Your shields replenish when they stop taking damage, so duck out of the way every so often during fights and let them recharge.
When you make your way through the Covenant ship to rescue the captain, notice that some of the doors have a reddish cast to them. They won’t open, so ignore them.
If you’re not sure where to go while traveling with marines, you’ll notice that they won’t follow you if you go past a destination. So if you’ve gone too far and they’re not still with you, turn around and head back.
When you enter some levels, you’ll notice Covenant grunts sleeping. You can walk around them without waking them up, but as soon as other Covenant forces, who don’t seem to enjoy snoozing, discover you and start firing, they’ll rouse and join the action.
|
|
The Covenant’s plasma guns are often more effective than the Marine-issue rifles because they inflict greater damage, but the downside is that they can overheat easily if you fire too many shots at once, and eventually their energy sources will die (they don’t require any reloading, which is nice). Swap the plasma gun you’re carrying for another of the same type every time you come across one (Covenant forces drop them when they die, in addition to plenty of plasma grenades) to make sure you always have a fresh weapon.
Grenades are largely useless against a Jackal because it can use its shield to deflect the blast. Aim for any part of its body that’s partially exposed and shoot it; this will cause the Jackal to stagger momentarily, dropping his shield away from his body. Use that moment to put him down. If he’s too well hidden behind his shield, pound it with shots from your weapon until the sheer force causes him to stagger.
The AI in Halo is sophisticated enough that enemies will take cover when you toss a grenade at them. Use this to your advantage by tossing the grenade into a likely place where they will hide from the blast, forcing them to stay out in the open. You can also toss a grenade and then gun them down as they run for cover.
Banshee pilots like to swoop when they attack, so take them down by waiting for that moment and delivering a rocket straight into them as they drive toward you.
|
System Requirements
| Mac OS X version 10.2.8 (10.3 or higher recommended)
|
| 800MHz PowerPC G4 processor (1GHz or higher recommended)
|
| 256MB of RAM (512MB recommended)
|
| 32MB AGP Video Card; GeForce 2MX/ATI Radeon 7000 or better (64MB AGP Video Card; GeForce 4Ti/ATI Radeon 9000 or better recommended)
|
| 1.4GB hard disk space
|
| Internet or LAN connection required for online play
|
|
|
|
|